

As a home daycare provider and parent of two children, I find helping young ones manage their emotions is one of my most important tasks as a caregiver. When a child is going through a growth phase, or a big life event, their emotional imbalance often reveals itself through their behaviour. Some days are filled with a beautiful cohesive calmness in our house and some days….not so much. I employ a variety of different methods to help the children in my care weather the storm until they reach their next sunny day. Making and playing with homemade play dough is one of those methods.
Making play dough is easy and also an activity that will benefit the whole group as well as the child you are trying to help. Having some degree of control over a situation will help settle a child who feels overwhelmed. Therefore, my suggestion would be to encourage the troubled child to decide on the colour to make the play dough and have him/her stir the ingredients. Holding the special role of helper will boost a child’s confidence. The extra attention will be soaked up by the child who is feeling left out and lacking in quality time. The sensation of touching and making something from raw ingredients and then transforming it into a sculpture is very satisfying for any child.
Everyone (including you!) will benefit from kneading the warm dough as you meld the ingredients together. The tactile action of squishing and pounding the dough creates a beautiful calm sensation throughout the child’s body. Stepping into a creative head space by making pretend food or play dough animals is a great way to help a child sink into a relaxed disposition.
Here is my favourite homemade play dough recipe on the web from Anna at The Imagination Tree.
We double the recipe and use:
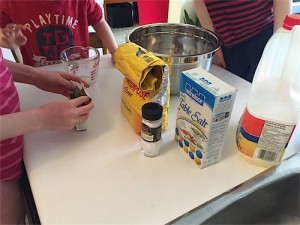
- 4 cups of plain flour
- 4 tablespoons of vegetable oil
- 1 cup of salt
- 4 tablespoons of cream of tartar
- 3 cups of boiling water (added slowly while stirring)
- add food colouring in the water

My group enjoys measuring and pouring the ingredients. In goes the flour. They like to poke at the flour with their fingers and feel how soft it is.

In goes the salt. Invite the children to listen to the salt as it flows into the bowl. Feel the salt. It feels different than the flour.

Add the cream of tartar and vegetable oil. I let the kids mix up the ingredients with their hands.

By now the water has boiled and I add the food colouring as the little ones practice counting the drops. Add the drops slowly and let the children watch the colouring spiral out through the water in swirling tendrils. I find you need to add A LOT of drops for vibrant colours.
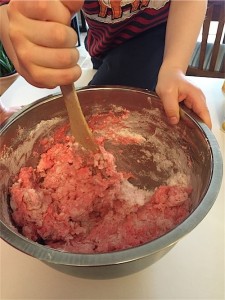
Slowly add the coloured water to the dry mix. The kids need to use their arm muscles to stir at this point. Once it has cooled a bit I let them dive in and mix it with their hands.
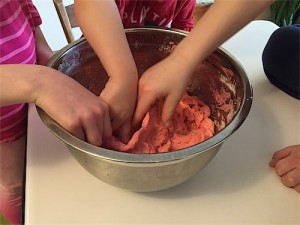
Knead and work the dough as it cools. This helps to make sure it will stay nice and soft and pliable.

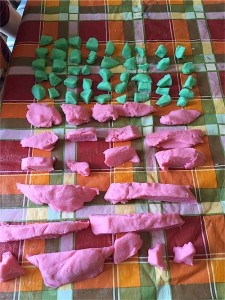
Today I gave each child a plastic fork, knife and spoon with their lump of play dough.

They sliced and talked and played for an hour!

Here are pieces of ‘banana bread’ at their pretend cafe.
The children who came together in the kitchen at the beginning of this activity certainly didn’t behave or sound like the same group who left the activity an hour and a half later. My group was filled with joy, generosity and calmness as they helped tidy up the play dough.

You can keep the play dough for months and it will stay soft as long at it is stored in an air tight container. I use plastic ziplock bags and squeeze out the air.
Happy Therapeutic Molding!
 I’m a former elementary school teacher, and homeschool mother of two, who runs a Waldorf inspired home childcare/preschool.
  Sign up now for my newsletter to receive my free "Home Daycare Curriculum."
[…] made some homemade play dough for my daycare group today. It’s winter here and I thought they would enjoy making their […]