
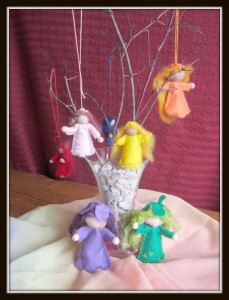
Spring is here! The flowers need to be awakened by the spring flower fairies. Our Waldorf inspired Nature Table displays the flower fairies. Each flower fairy represents a different colour of flower and it is that fairy’s job to fly above the ground and ‘wake up’ the flowers.

I try to tell this story the first day I see the hint of a tulip bud showing in our front flower bed. Then the next day the children and I check the flower bed to see if we can see any other flowers awakening with the help of the spring fairies.
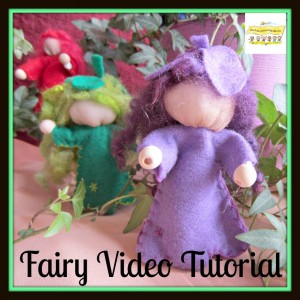
Spring Fairy Tutorial
Materials:
Embroidery Needle
Stuffing
Nylon or skin toned fabric
Wool Roving(for hair)
Pipe Cleaner
Small beads for hands
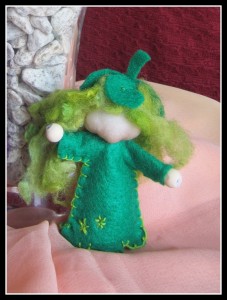
Flower Fairy Dimensions:
The head is 1″ in width
Start with a 5″ pipe cleaner (you will need to twist it) and then cut to your desired arm length.
The fairy dress is 2 3/4″ in width from sleeve cuff to sleeve cuff. The depth of each sleeve is 3/4″. The length of each sleeve is 3/4 “. The length of the full dress from neck to bottom hem is 2 3/4”. The neck opening is about 1/2″ in width. These measurements are to give you an idea of the size of the fairy I made on the video. I’m not an exact measurement type of crafter, each fairy is a bit different.

I hope these measurements give you a starting point of reference and then you adjust the design and size to fit your fairy needs.
Spring Fairy Video Tutorial:
 I’m a former elementary school teacher, and homeschool mother of two, who runs a Waldorf inspired home childcare/preschool.
  Sign up now for my newsletter to receive my free "Home Daycare Curriculum."
These are so sweet!
Thank you for visiting Waldorf Wednesday. Hope to see you back this week!
http://ourseasonsofjoy.com/waldorf-wednesday-link-up/waldorf-wednesday-31/
Thank you for these delightful ideas. The little flower fairies would make excellent finger-puppets, too, if you leave out the stuffing.
I loved it. I can’t wait to do those for my nature table.
Thank you for sharing